By: Deborah O'Malley, M.Sc | Last updated December, 2021

Good news!
In the free A/B testing platform, Google Optimize, it's easy to set-up your first A/B test.
But, so that you can accurately, and confidently, perform the set-up, this article breaks down exactly what you need to do -- and know -- with definitions, examples, and screenshots.
Imagine that you're about to set-up and run your first A/B test. Exciting times!
Let's say you've decided to test the button copy on your sign-up form. You want to know if the text "sign up now" converts better than "get started".
Well, by running an A/B test in Google Optimize, you can definitively determine if one text variant will outperform.
To begin, you simply need to open Google Optimize, ensure it's set-up for your specific site and click the "Create" button in the upper right hand corner of your screen in Google Optimize.
Doing so will create a new test experience:
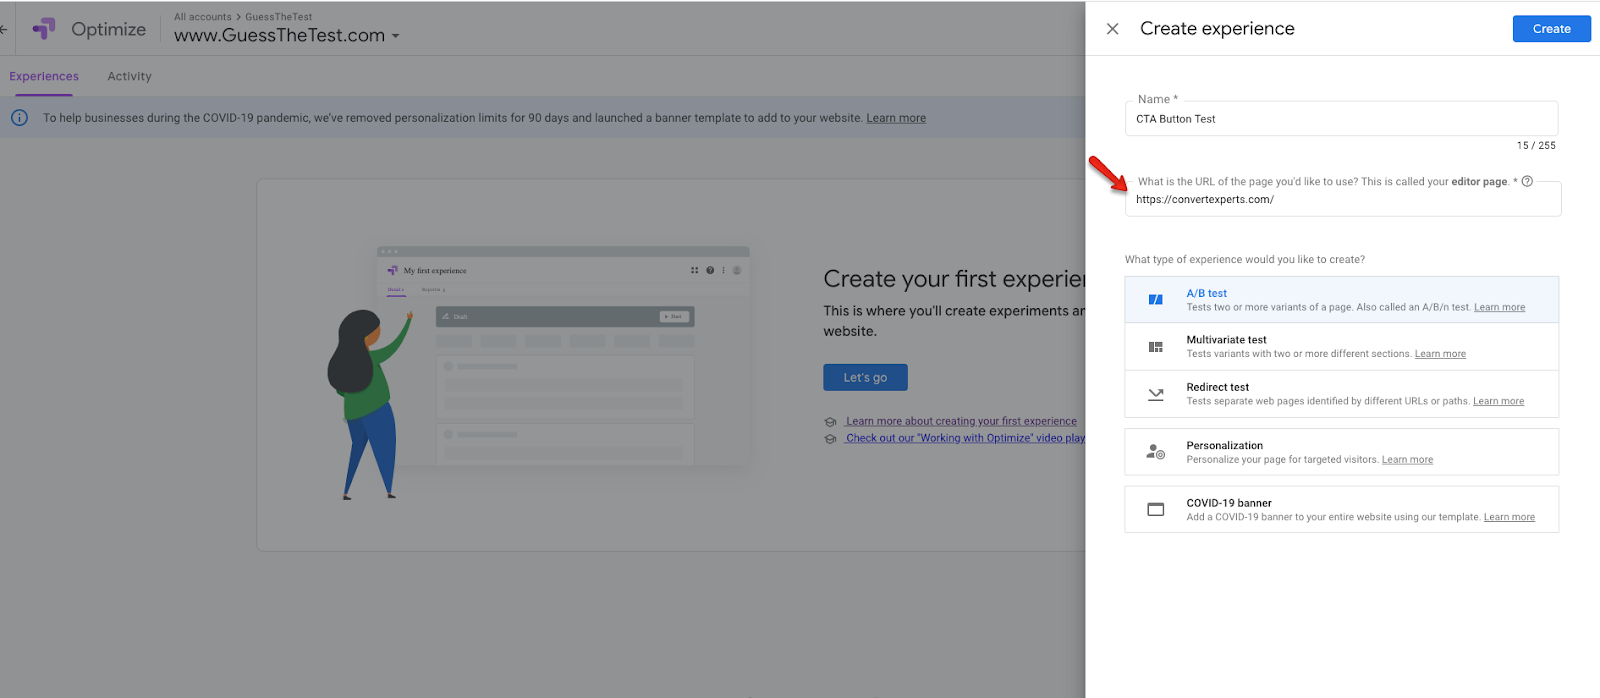
A screen will slide out from the right side, asking you both to name your experiment, as well as define what kind of test you’re going to run:
You'll first need to name the test.
The test name should be something that is clear and recognizable to you.
*Hint* - the name should be both memorable and descriptive. A title both you and your colleagues or clients will immediately understand and recognize when you come back to it in several months or even years time.
For this example, we’ll call the test “CTA Button Test”
You’ll next be prompted to type in the URL of the webpage, or website, you’d like to use.
This URL is very important to get right.
It’s crucial you input the URL of the control -- which is the original version you want to test against the variant(s).
If you’re running a re-direct test and you select the URL of the variant, the variant will be labeled as the control in Google Optimize and it will totally mess up your data analysis -- since you won’t be able to accurately compare the baseline, or performance of the original version against the variant.
Trust me! I’ve seen it happen before; it’s a mistake you want to avoid.
So, make sure you properly select the URL of the page where your original (the control) version currently sits on your site.
If the element you want to test is a global element, for example, a top nav bar button that shows on all pages across the site, you’ll use the homepage URL.
In this example, the button we’re testing is in the top nav header and shows on every page of the site. So, we’ll use the website's homepage URL: https://convertexperts.com/
We’ll enter that URL into the URL field:
In order to accurately run the proper test, you'll need to choose the correct type of test to run.
In Google Optimize, there are four different test type options:

Most of the time, you'll be a running a straight-up A/B test. But to know for sure which test type is best for your needs, check out this article.
For our example, we just want to set-up a simple A/B test looking at the effect of changing the CTA button.
For your test, once you've confirmed the type of test you're going to run, you're ready to officially set-up the test, or as Google Optimize calls it, "create the experience."
To do so, simply press the blue "Create" button in the upper right hand corner:

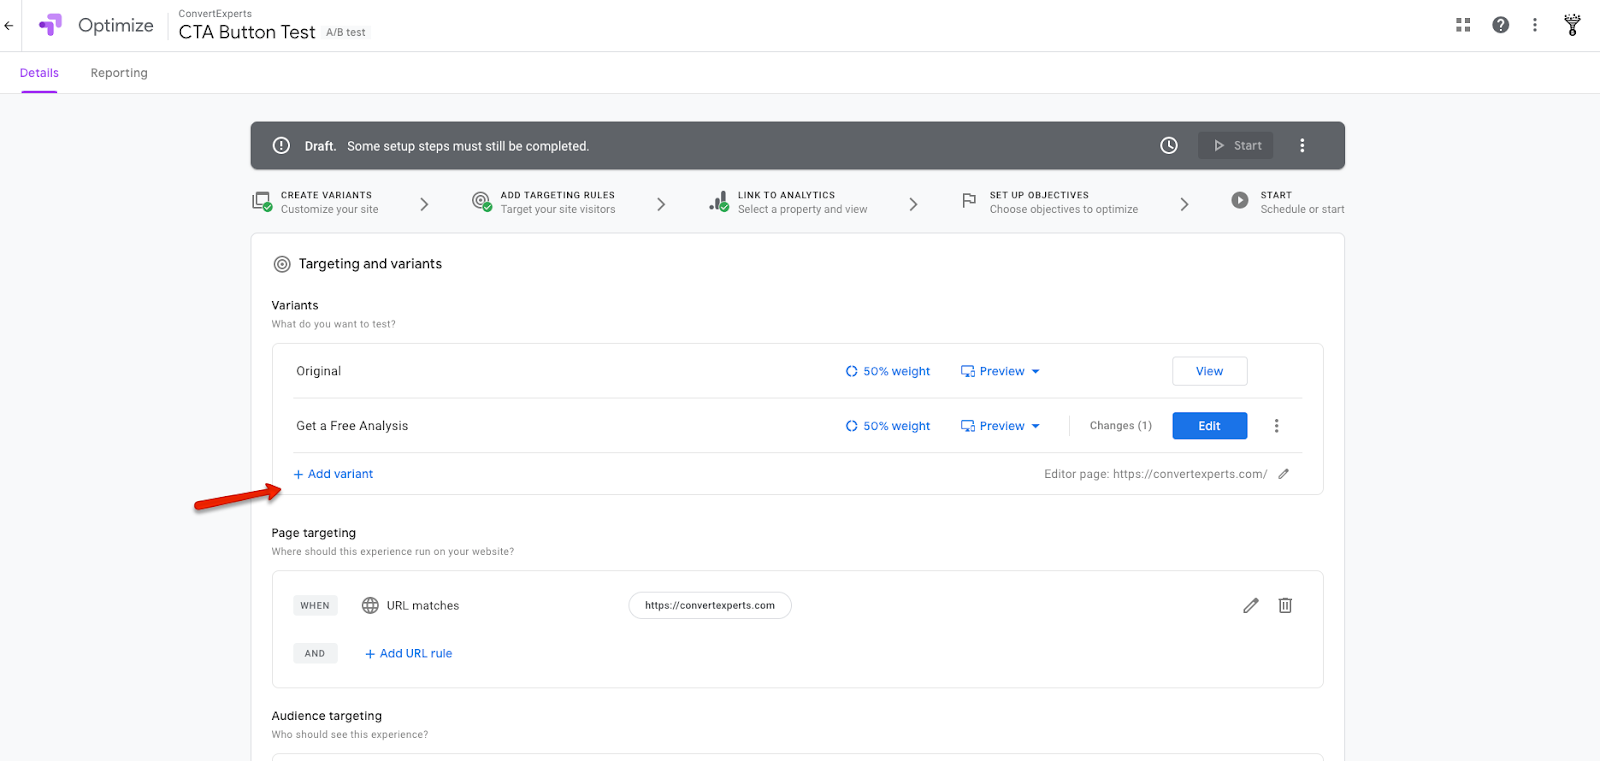
Once you've created the experience, you’re now ready to continue setting up the test, starting with adding your variant(s).
The variant, or variants, are the versions you want to test against your control. Typically, in an A/B test, you have one variant (Version B).
But, as long as you have enough traffic, it's perfectly legitimate to run an A/B/n test with more than one variant (where n stands for any number of other variants.)
To set-up your variant(s), sSimply click the blue “Add variant” button:
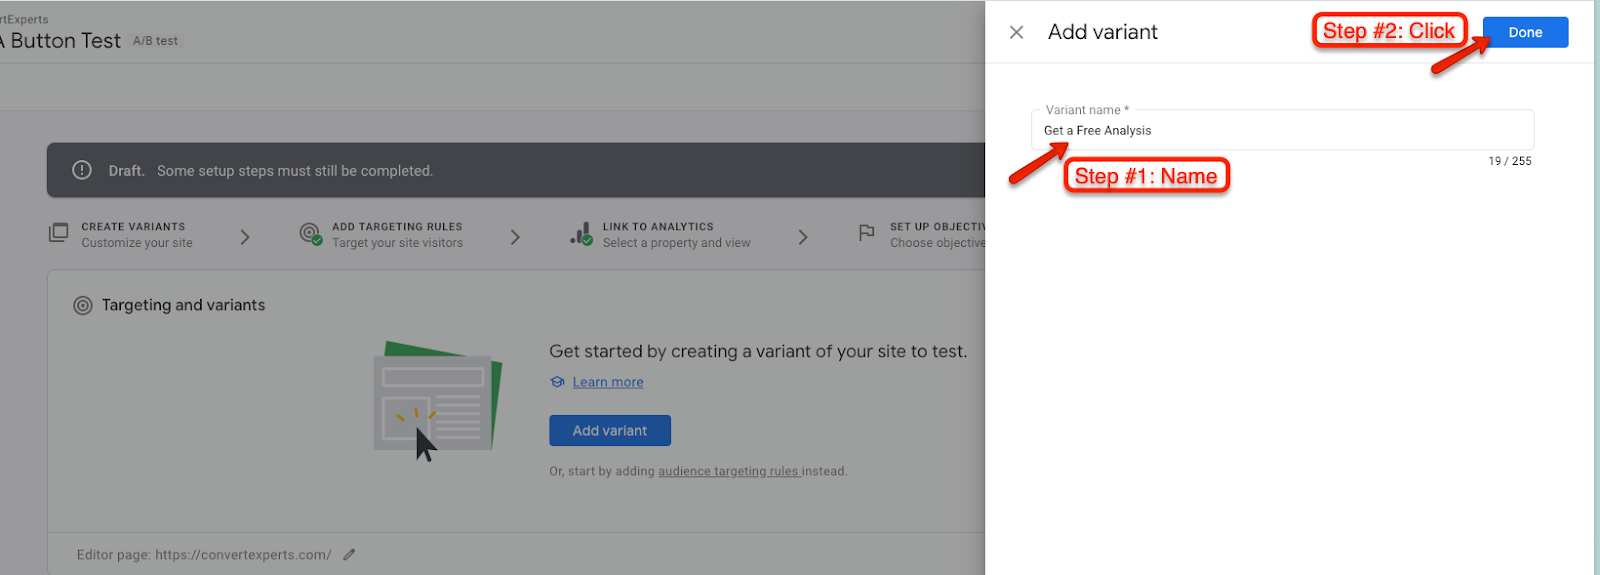
Next, name the variant with a clear, descriptive, memorable title that make sense. Then click “Done”:
Woo hoo! You’ve just set-up your A/B test! 🙂
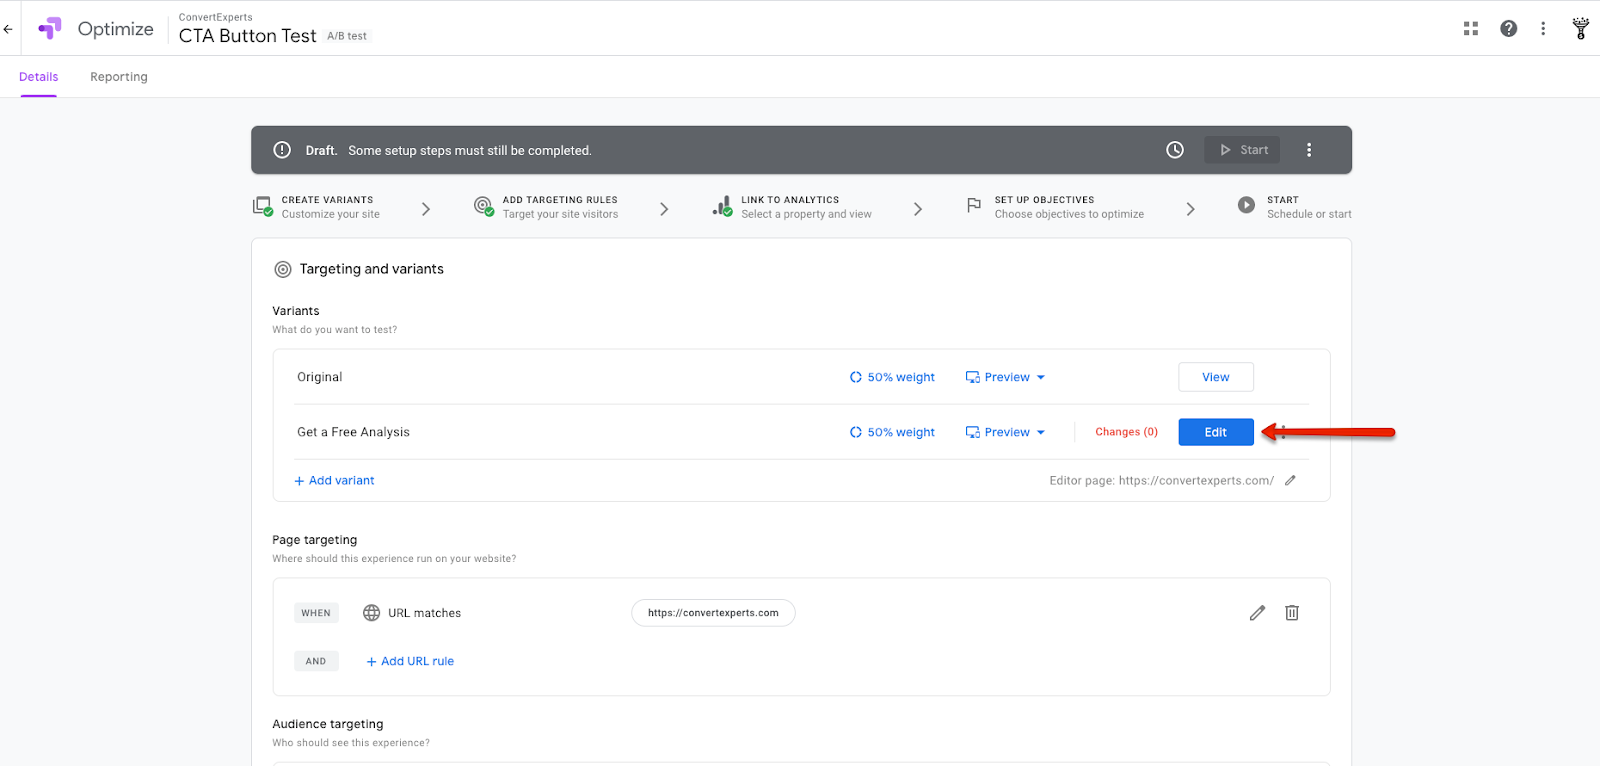
But, your work isn’t done yet. . . now you need to edit your variant.
Remember, the variant is the version you want to test against the control.
To create the variant, you can use Google Optimize’s built-in WYSIWYG visual editor.
Or, for more complex tests and redesigns, you might want to inject code to create the new version.
To do so, you click “Edit”:
Note, the original is the version currently on your site. You can not edit this page in anyway through Optimize. The name cannot be changed, nor can the page URL.
You’re now brought into an editor where you can inject code or get a visual preview of the webpage itself.
Using the visual editor, you can click to select the element you want to edit, and make the change directly.
Optimize’s visual editor is pretty intuitive, but if you’re unsure what elements to edit, you can always refer to this guide.
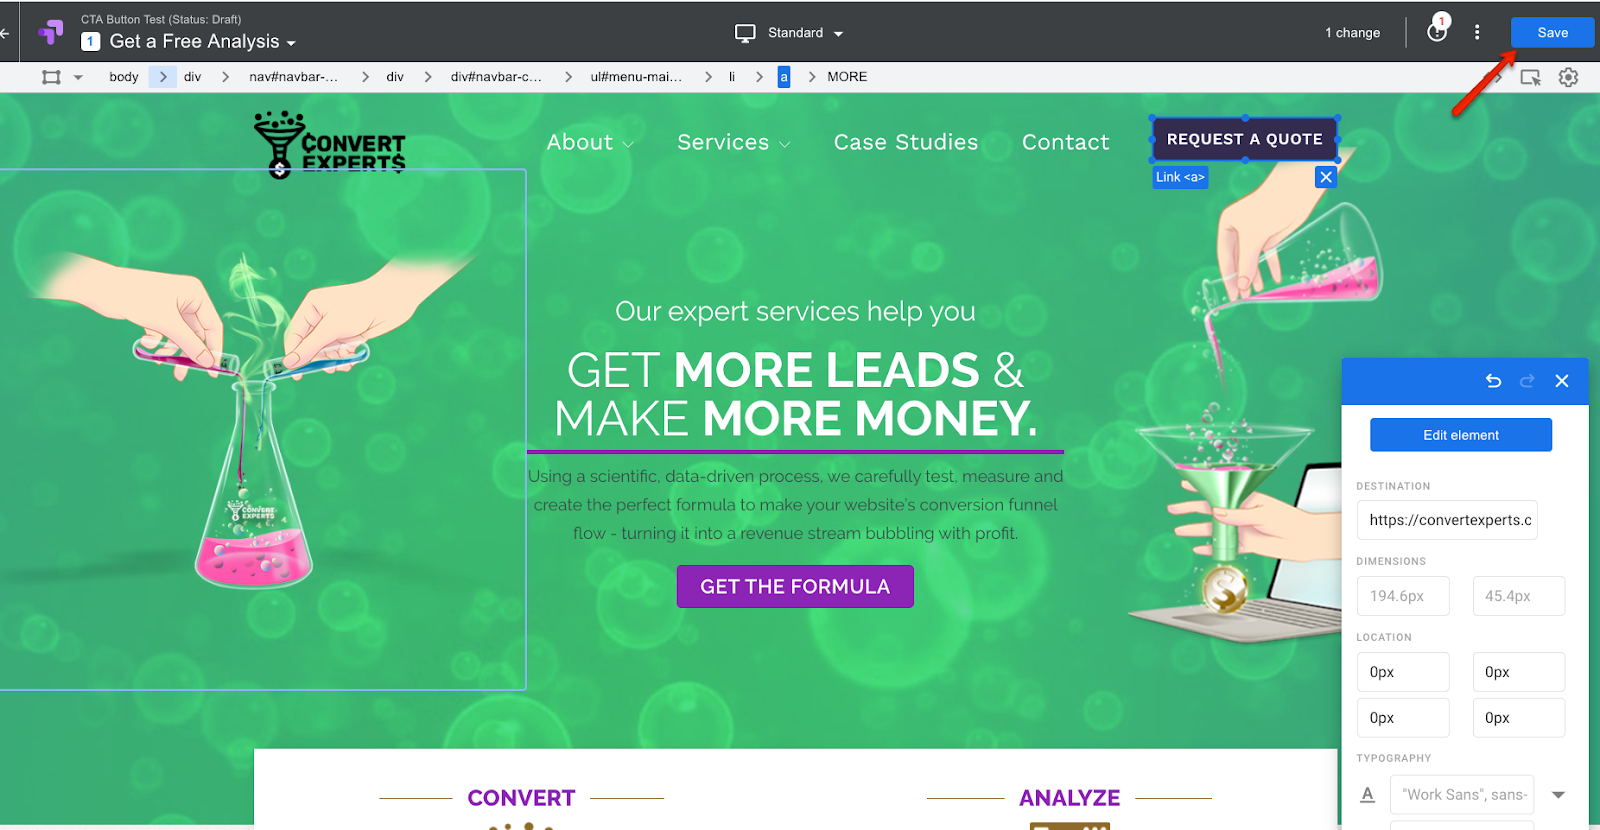
In this example, you see the visual editor.
To make changes, you'd first click to select the “Get a Free Analysis” button text, and then click to edit the text:
Now, type in the new text, “Request a Quote” and click the blue “Done” button at the bottom right of the preview editor screen:
When you're happy with all changes, click the top right "Done" button again to exit out of the preview mode:
You're now brought back into the Optimize set-up:
Here, you could continue adding additional variants, in the same way, if you wanted.
You could also click the "Preview" button to preview the variants in real-time.
Once you've assigned and defined your variants, you're going to want to state the weight of traffic, or what percentage of traffic will be allocated to each variant.
The default percentage is a 50/50% split meaning half of visitors (50%) will see the original version and the other half (50%) will see the variant.
As a general testing best practice, traffic should be evenly split, or when testing two versions, weighted 50/50.
As explained in this article unequal allocation of traffic can lead to data discrepancies and inaccurate test results.
So, as a best practice, don't change this section.
But, if for some reason, do you need to change the traffic weight, you can do so by clicking on the link that says "50% weight":

A slide-out will then appear in which you can click to edit the weight to each variant. Click the "Custom percentages" dropdown and assign the weight you want:

If you were to assign an 80/20% split, for example, that would mean the bulk, 80% of traffic, would be directed towards the control and just 20% of visitors would see the variant.
This traffic split is very risk adverse because so much of the traffic is diverted to the control -- where there is no change.
If you find yourself wanting to allocate traffic in this way, consider if the test itself should be run.
Testing is itself a way to mitigate risk.
So, if you feel you further need to decrease risk by only showing a small portion of visitors the test variant, the test may not actually be worth doing.
After all, testing takes time and resources. So, you should do it properly. Start with evenly splitting traffic.
You're now ready to set-up the page targeting.
Page targeting means the webpage that is being "targeted" or tested in the experiment.
You can target a specific, single page, like the homepage, a subset of pages, like all pricing pages, or all pages on the site.
In this test example, we want to select any URL that contains, or includes a certain URL path within the site.
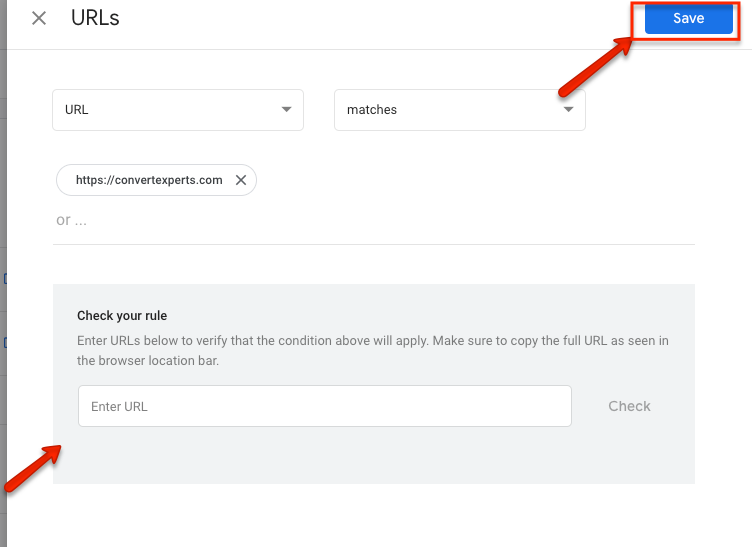
We're, therefore, going to set-up our Google Optimize test with a URL that “Contains” the substring match. We'll do so by going to the pencil or edit symbol, clicking on it:
And, selecting “Contains” from the dropdown menu:
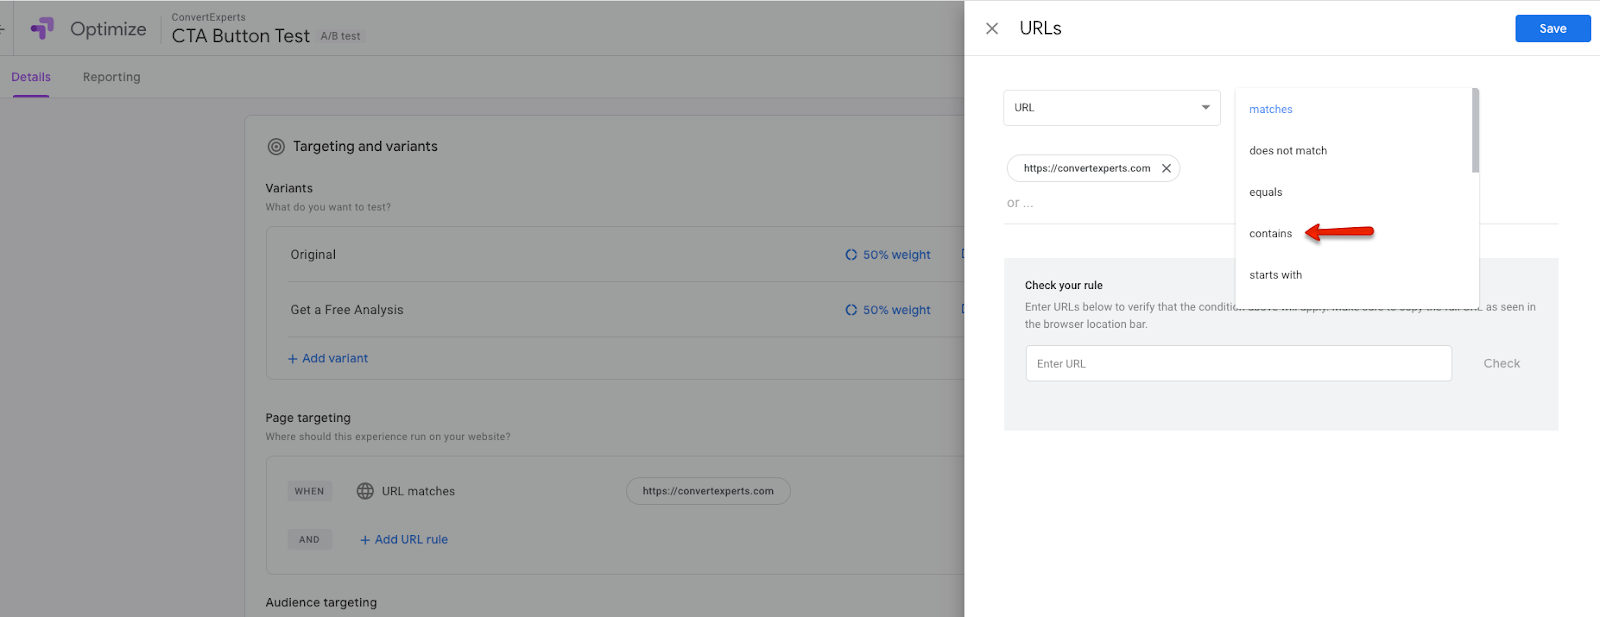
This rule is saying, I want all the URLs that contain, or have, the www.ConvertExperts.com URL to be part of the test.
In contrast, if we had selected “Matches”, the test would only be on the homepage www.ConvertExperts.com, because it would be matching that URL.
If you’re unsure which parameter to select for your test, you can consult this Google article.
If you want to verify the URL will work, you can check your rule. Otherwise, click “Save”:
Now, you can customize the test to display for only certain audiences, or behavior.
To do so, simply click “Customize”:
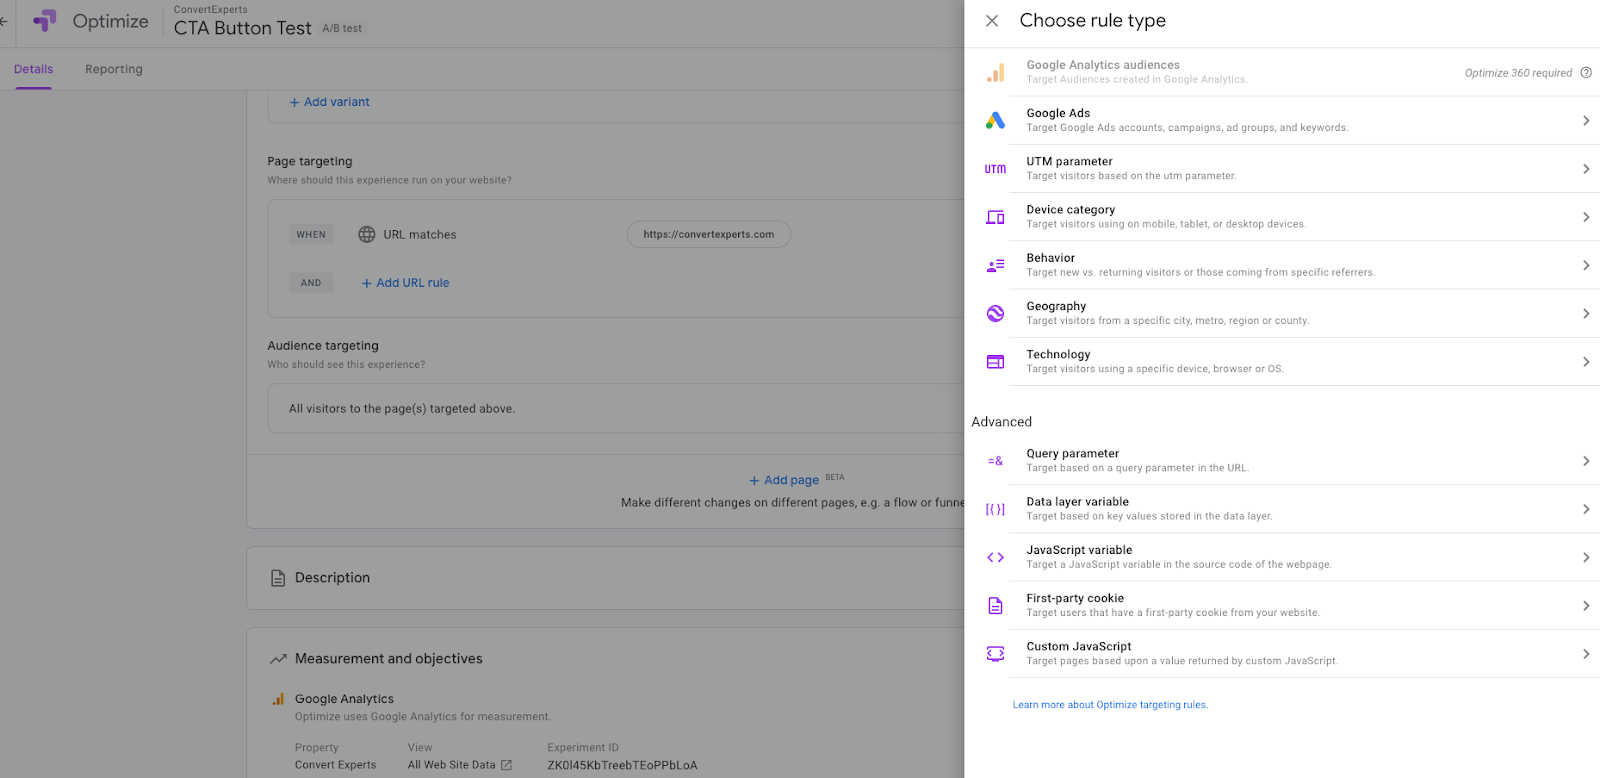
Here you can set a variety of parameters, like device type and location, if you only want certain viewers taking part in the test:
Note, if you want to parse out results by device type, that reporting is done in Google Analytics, and should NOT be activated within Google Optimize.
However, if you only wanted mobile visitors, for example, to take part in the test, then you’d select the “Device Category” option and choose only mobile visitors.
In this test example, we don’t have any rules we’d like to segment by, so we’ll leave everything as is.
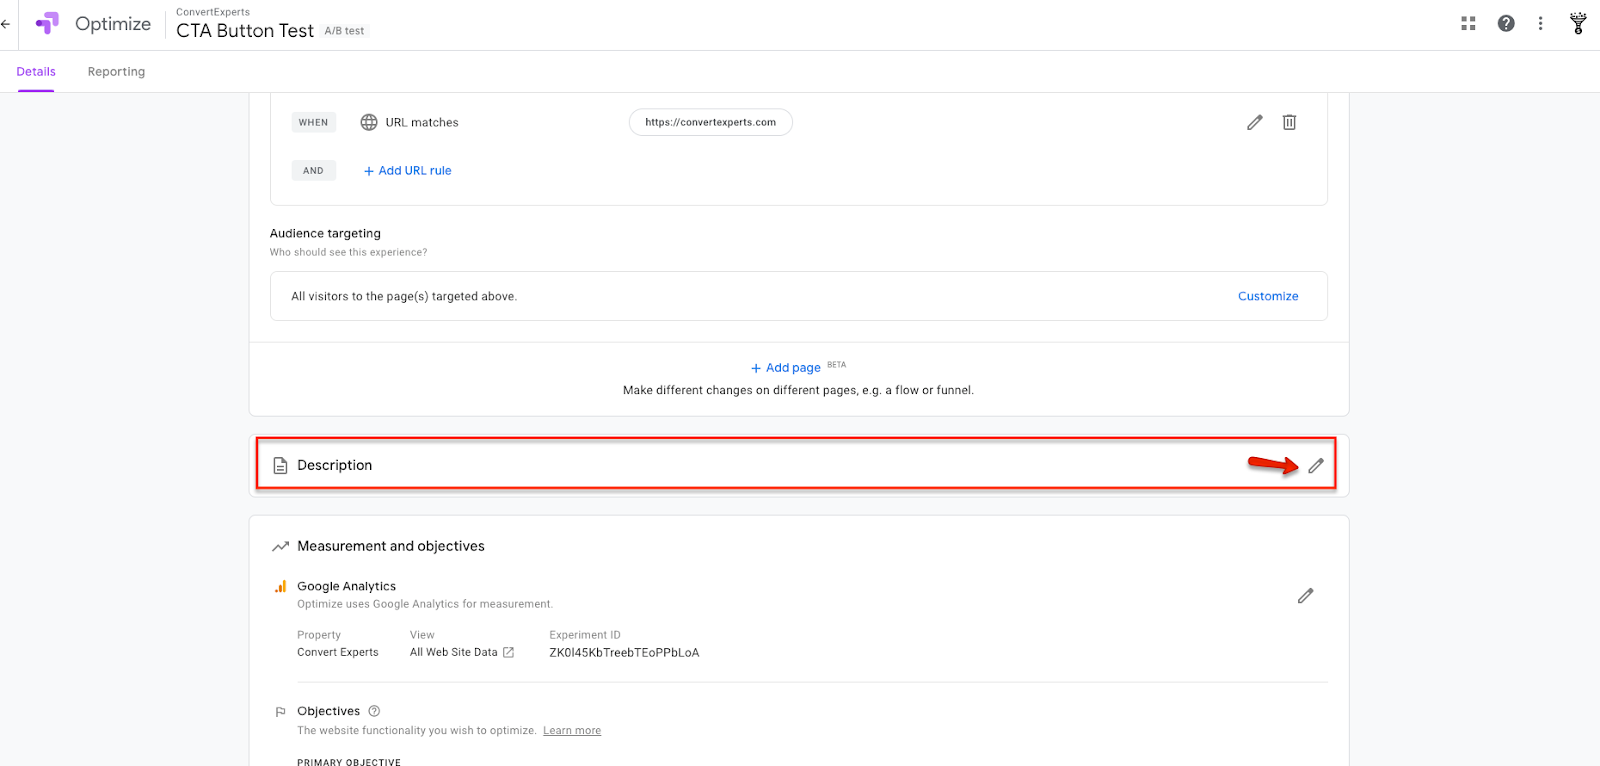
Next, you can add a “Description” about the test.
This step is optional, but is a good practice so you can see your test objective and remind yourself of the hypothesis.
Adding a description also helps keep colleagues working with you on the same page with the test.
To add a “Description” simply, click the pencil to edit:
Then, add your description text:

You're now ready to input your test goals.
"Goals" are defined as the conversion objectives or Key Performance Indicator (KPI) of what you're measuring from and hoping to improve as a result of the experiment.
You may have one single goal, like to increase form submissions. Or many goals, like increasing Clickthrough Rates (CTRs) and form submissions.
Your goals may be conversion objectives that you've newly set, or might tie-in to the existing goals you've already created, defined, and are measuring in Google Analytics.
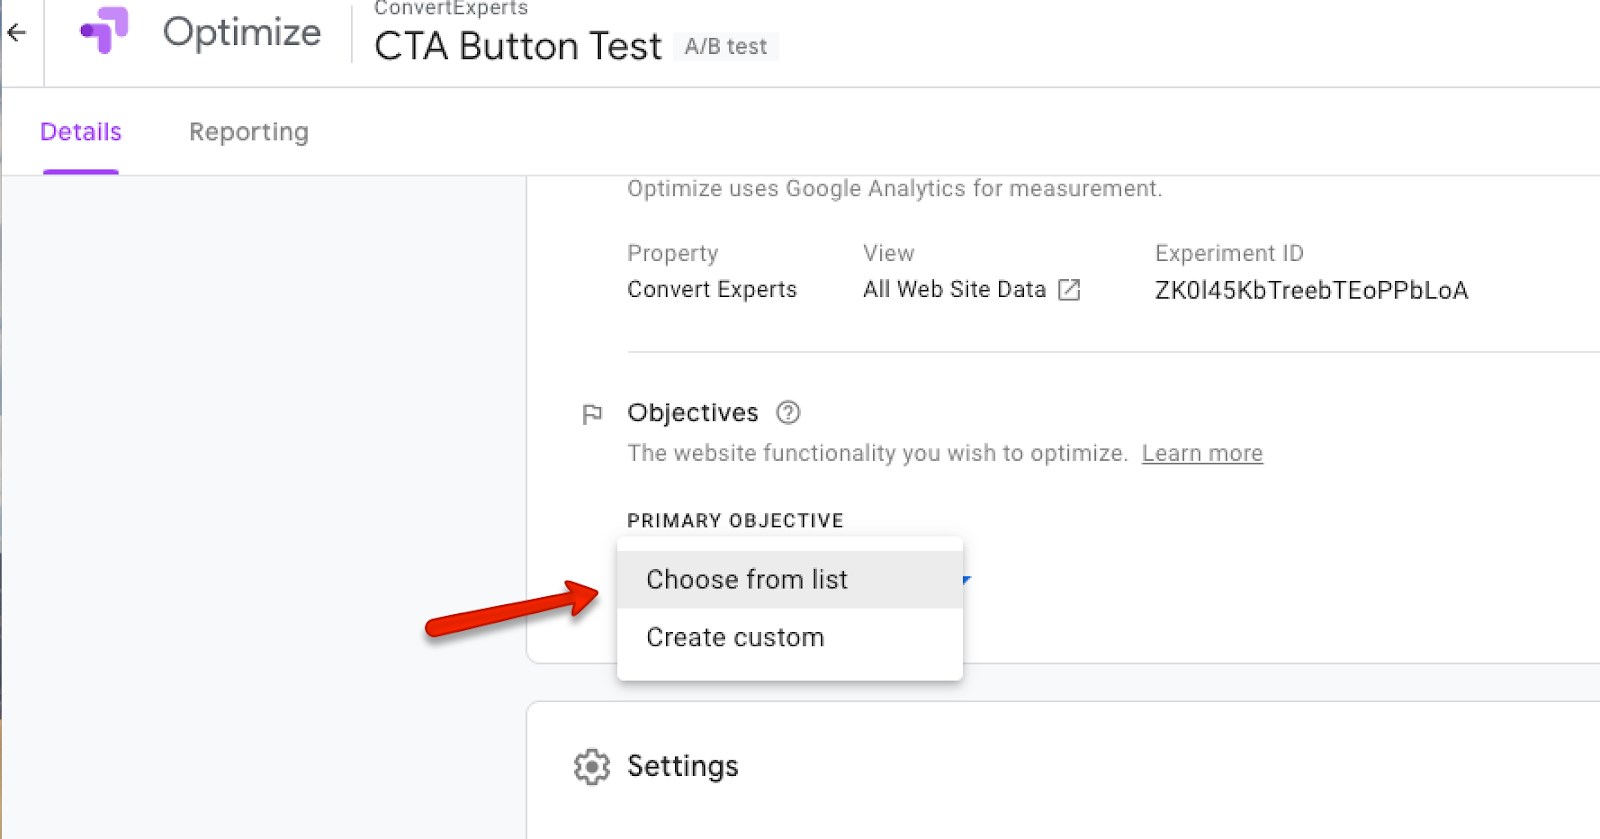
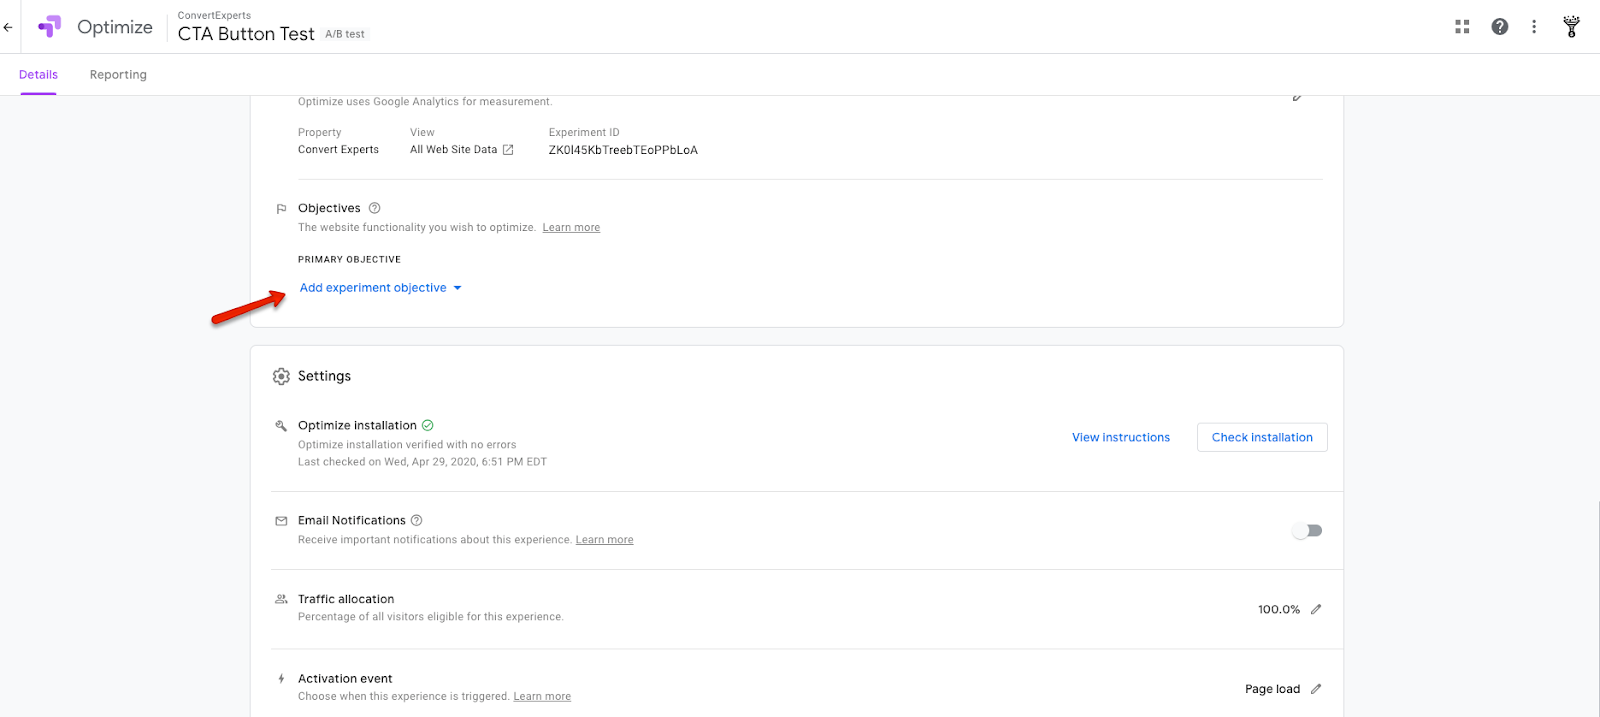
To set-up a new goal, or select from your existing goals, simply click the “Add experiment objective” button:
You'll then have the option to either choose from already populated goals in Google Analytics, or custom create new goals.
Note, if you're using existing goals, they need to have already been set-up in Google Analytics and integrated with Google Optimize. Here's detailed instructions on how to link Google Analytics into Google Optimize.
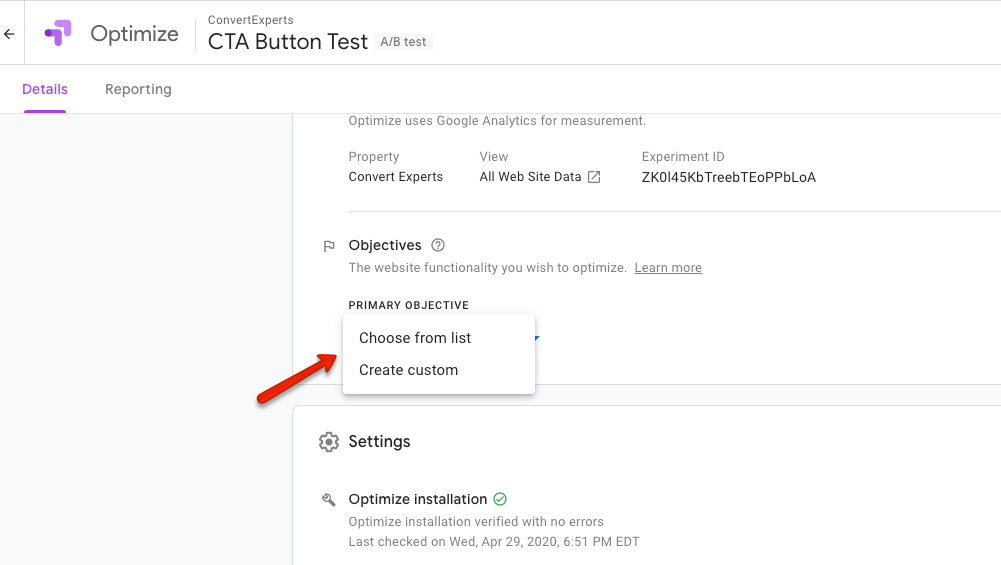
For this example, we want to “Choose from list” and select from the goals already created in Google Analytics (GA):
The GA goals now show-up as well as other default goals that you can select:
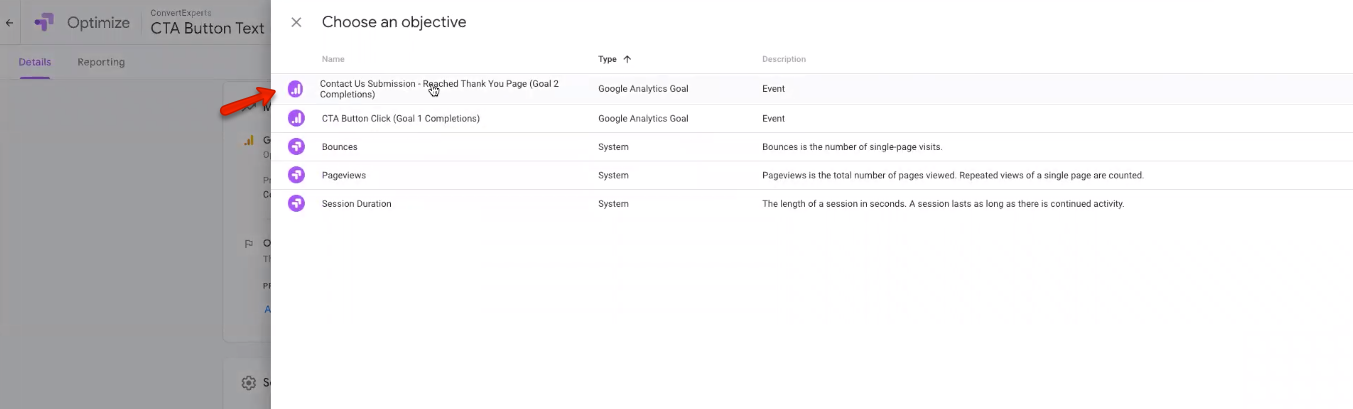
In this example, we want to measure those people who reached the thank you page, indicating they filled out the contact form. We, therefore, select the "Contact Us Submission" goal:
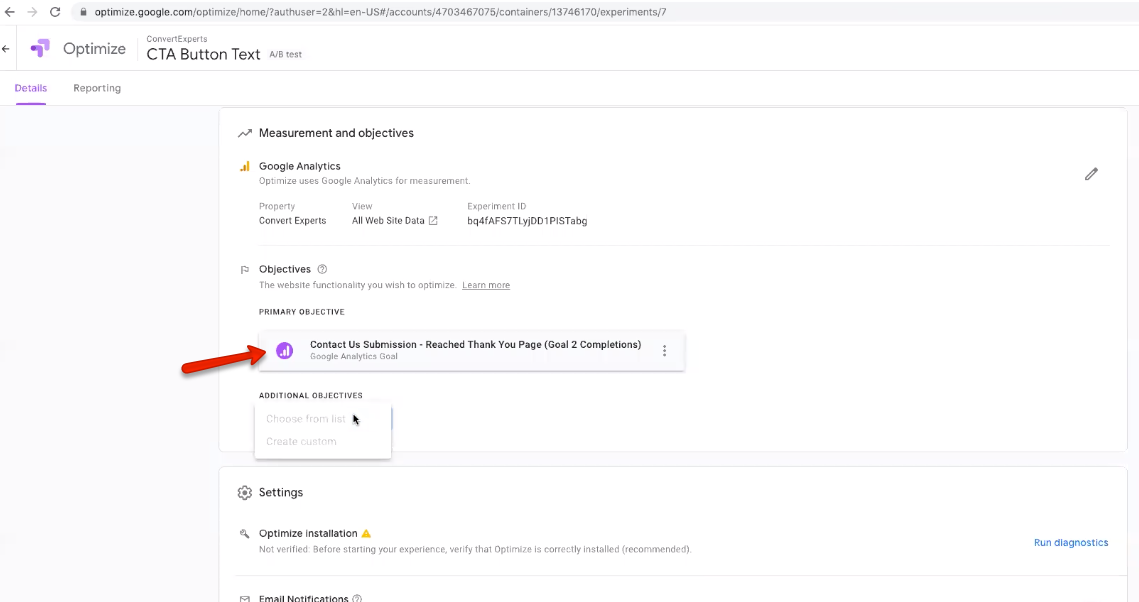
We can now add an additional objective. Again, we’ll “Choose from list”:
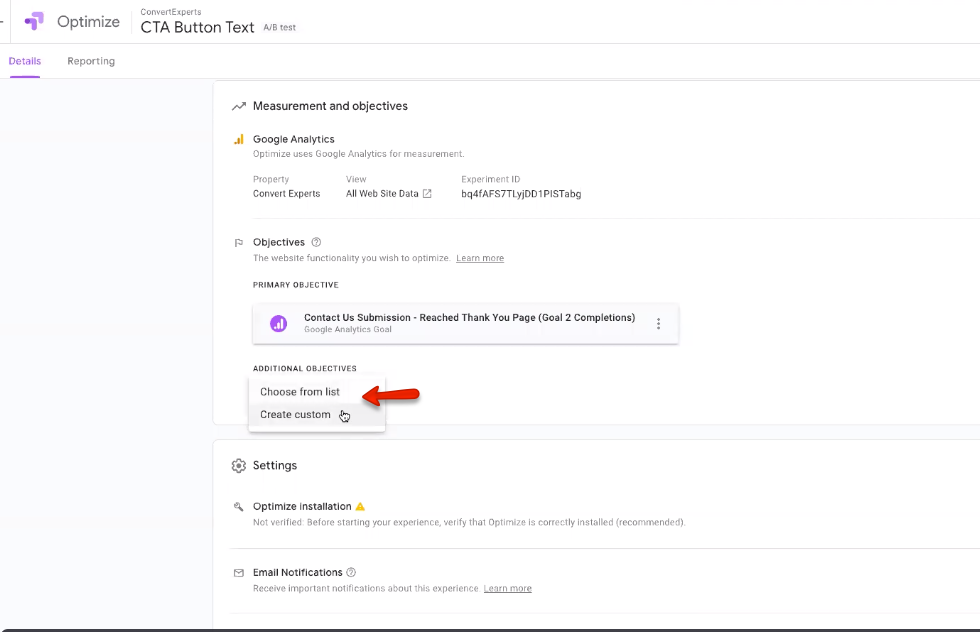
In this case, we also want to see if the button text created a difference in Clickthrough rate (CTR) to the form page.
Although this goal is very important it's labelled as the secondary goal because contact submissions are deemed more important than CTR conversions:

It's completely optional, but under the “Settings” section, you can also select to receive email notifications, by sliding the switch to on:
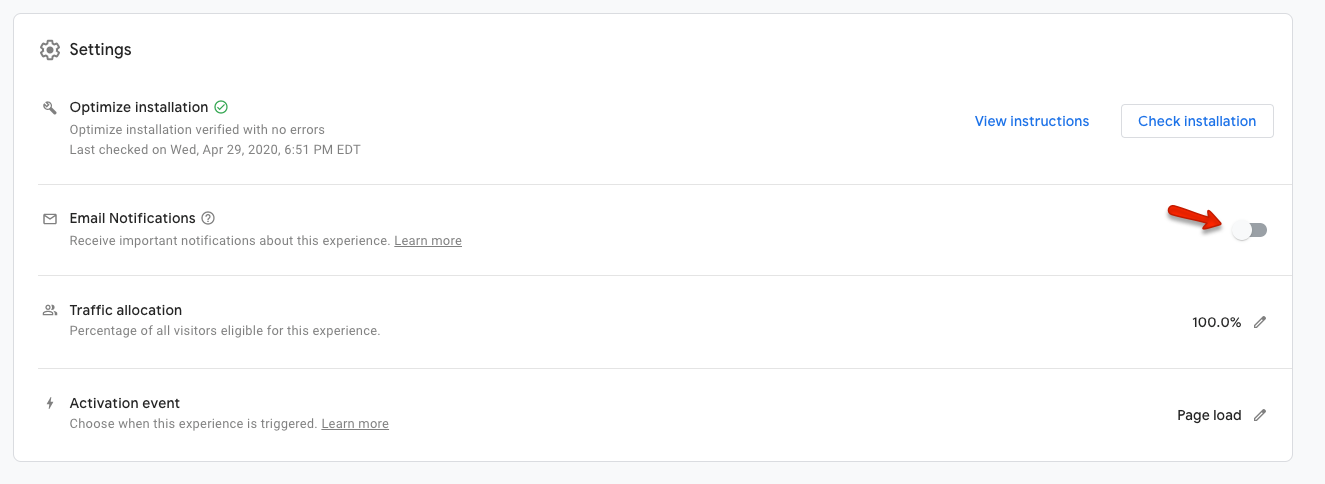
Traffic allocation is the percentage of all visitors coming to your site who will take part in the test.
Note, this allocation is different than the weight of traffic you assign to each variant. As described above, weight is the way you split traffic to each variant, usually 50/50.
Of that weighted traffic, you can allocate a percentage of overall visitors to take part in the test.
As a general best practice, you should plan to allocate all (100%) of traffic coming to your site to the test experiences, as you’ll get the most representative sample of web visitors.
Therefore, you shouldn't need to change any of the default settings.
However, if you’re not confident the test will reveal a winner, you might want to direct less than 100% of the traffic to the experiment.
In this case, you can change the traffic allocation from 100% of visitors arriving at your site to a smaller percentage by clicking the pencil to edit the value here (simply drag the slider up or down):


Note that the smaller the percentage of total traffic you allocate to your test, the longer it will take for you to reach a statistically significant result.
As well, as explained in this article unequal allocation of traffic, or reallocation of traffic mid-test can lead to data discrepancies and inaccurate test results. So once you've allocated, ideally, 100% of your traffic to the test, it's best to set it and forget it.
By default, “Page load” is the activation event, meaning the experiment you've set-up will show when the webpage loads.
So long as you want your test to show when the page loads, you’ll want to stick with the default “page load” setting.
If you’re testing a dynamic page -- one which changes after loading -- or a single page application that loads data after the page itself has populated, you’ll want to use a custom “Activation event” by clicking the pencil tool and selecting the activation event from the dropdown menu that fits best for you:


An activation event requires a data layer push using this code: dataLayer.push({‘event’: ‘optimize.activate’}); You can learn more here.
Note, in the free version of Google Optimize, you can choose up to one primary objective and two secondary objectives.
Once these objectives are selected and your experiment launched, you can’t go back and change them.
So, make sure you think about how you want to track and monitor conversions before you launch your test!
With all your settings optimized, you’re nearly ready to start your test!
But, before launching, it’s always a good idea to preview your experiences to make sure everything looks good.
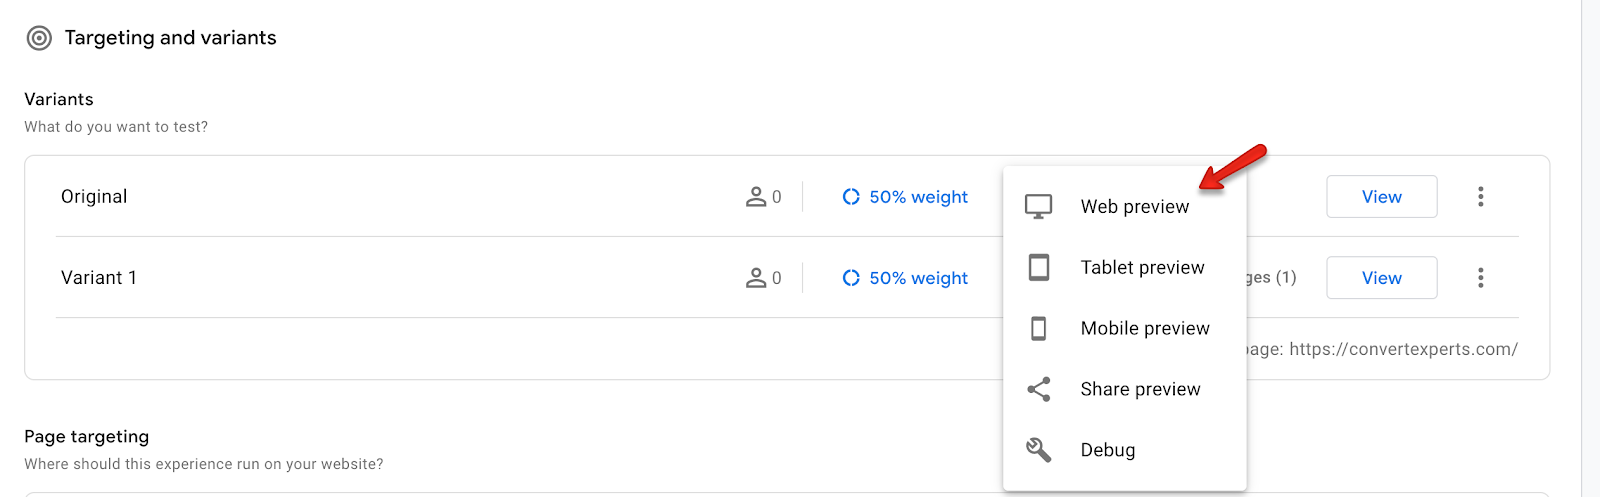
To do so, click on the “Preview” button in the Variants section and select the appropriate dropdown menu for the view you want to see:

My recommendation is to individually preview each variant in web, tablet, and mobile preview mode:
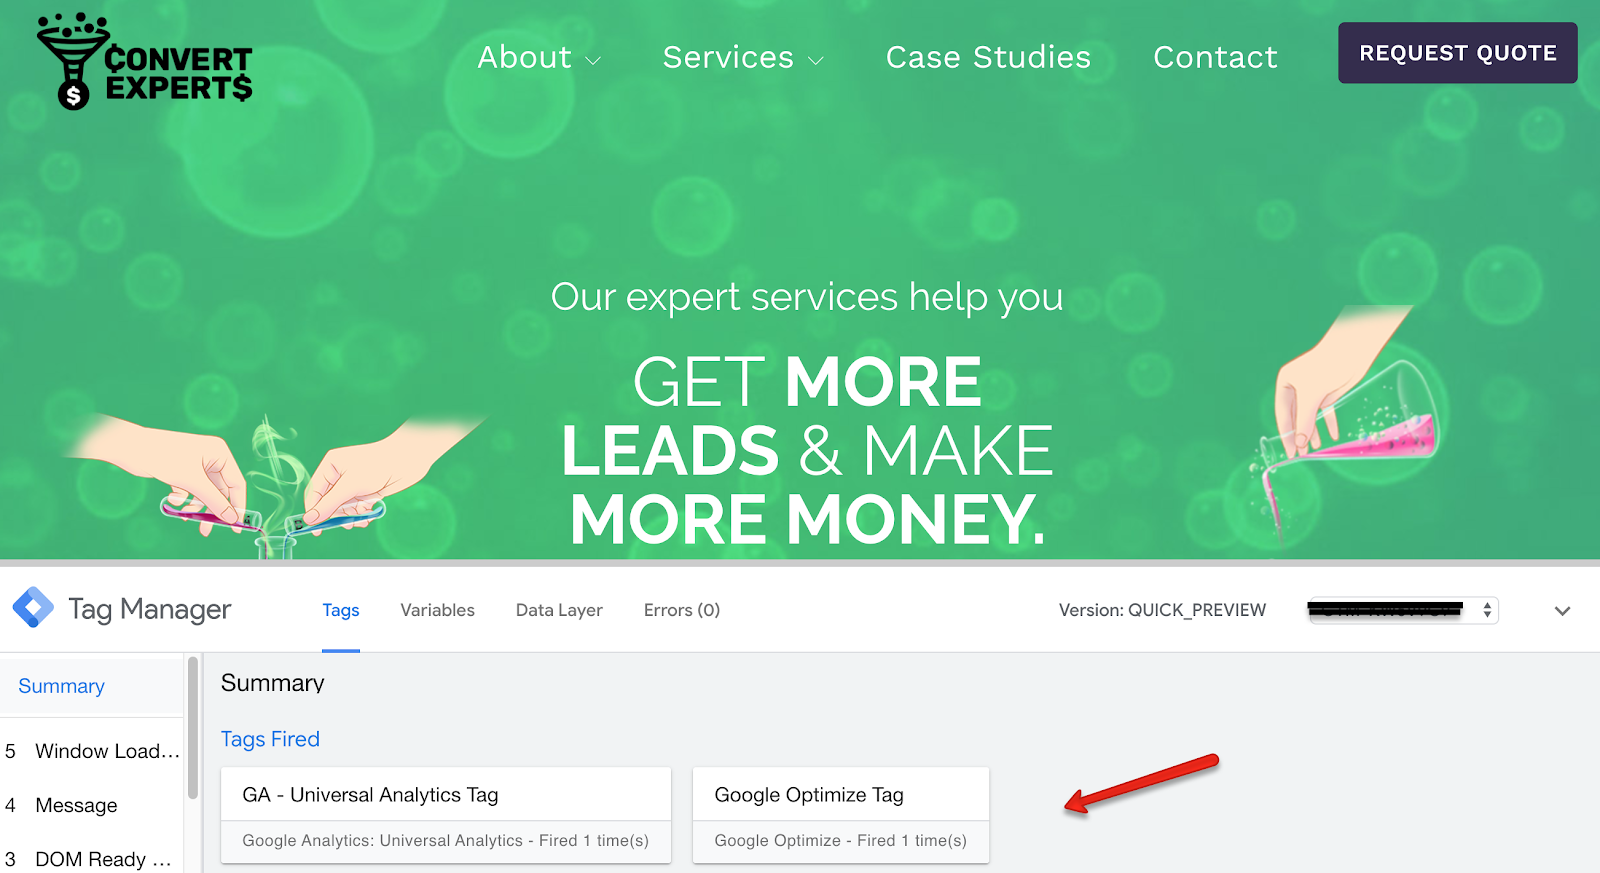
Next, you’ll want to click the “Debug” option within the Preview mode:
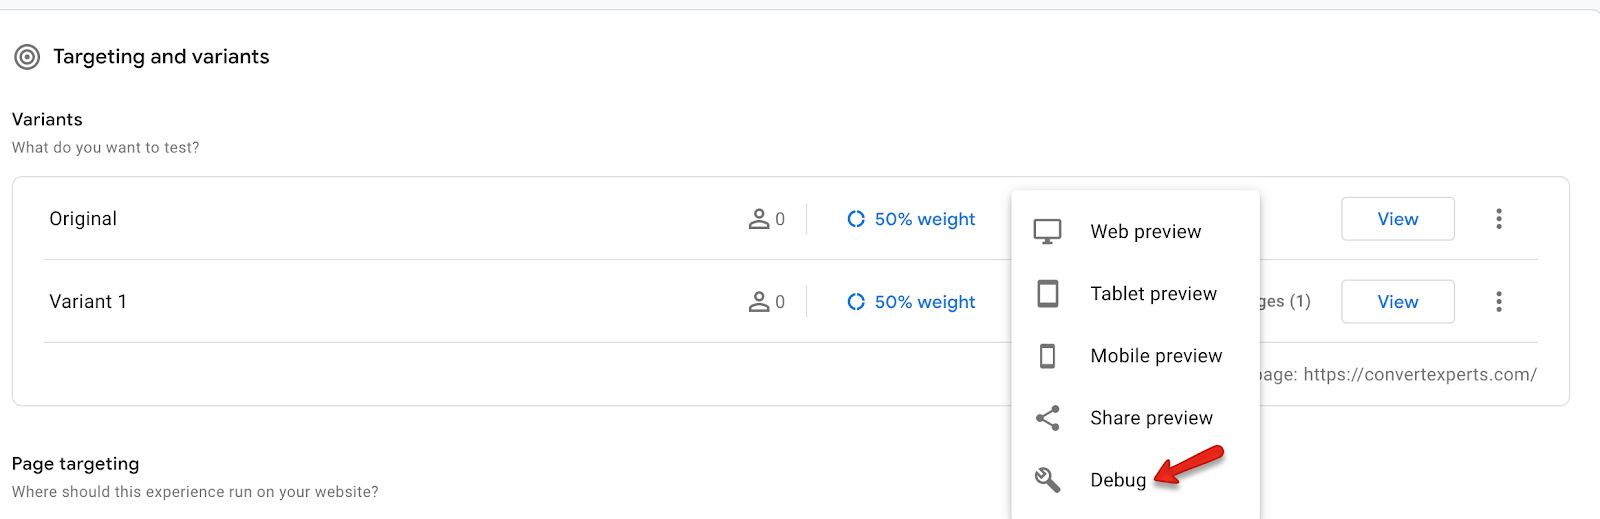
Clicking into the Debug mode will bring up the website you’re testing and will show you a Google Tag Manager (GTM) screen, with the targeting rules for the tags that will be firing:
If there are any issues, you can debug them now -- before launching your experiment.
If you’re working with stakeholders, or clients, on the test, it’s a good idea to let them know the test is set-up and ready to launch, then get their approval before you start the test.
Previewing the test variants, and sending them screenshots of the preview screens will enable you to quickly and efficiently gain stakeholder approval.
You're then ready to launch the test! 🙂
With all your i’s dotted and t’s crossed, you’re ready to launch your test!
Woohoo!
To do so, simply click the “Start” button at the top right of the screen.
And, ta da! You’ve just set-up an A/B test in Google Analytics.
Congratulations. Well done!
Hope you found this article helpful!
Do you have any thoughts, comments, questions?
Share them in the Comments section below.
A primer explaining the 4 different types of tests you can run, what they mean, and how you can use each to improve your competitive testing advantage.
One of the most debated testing topics is how large does my sample size need to be to get trustworthy test results? Some argue samples of more than 120,000 visitors per variant are needed to begin to see trustworthy test results. Ishan Goel of VWO disagrees. What does he think is needed to get trustworthy test results? Listen to this webinar recording to find out.
To get users clicking your content, which format works best: buttons or links. A series of 8 real-life A/B tests suggests one format consistently outperforms. Can you guess which version wins? Checkout the mini meta analysis to find out.